Knowing when and how to properly transplant your tomato seedlings from a seed tray is essential for successfully growing them. The timing is important for the tomato seedlings as it can help determine whether they will become strong and healthy plants or if they will be stunted and never produce fruit.
For best results, transplant your tomato seedlings when they are 4-6 weeks old. They should have 2-3 sets of true leaves and be 3-5 inches in size. Transplanting them any earlier can shock the plants and hinder their growth.
If you wait too long to transplant, the plants can become rootbound and this will also stunt their growth into the seed tray.
Let’s deep down know about the real timing of tomato seedling transplantation from the seed tray and do the further assortment of seedlings.
When to Up Pot Tomato Seedlings?
At the stage when you can understand the seedlings fulfilled the basic requirements of 2-3 pairs of established leaves and quarter feet height length, then you can actually up pot it and move to the next stage.
The process of transplanting from one pot to another is called uppotting or re-potting. It is a gardening term that means to transfer a plant from its current pot into a larger one.
The roots of the plant will have outgrown the current pot and will need more space to continue growing. This is typically done when a plant is too large for its pot and is in danger of becoming rootbound.
To do that tomato seedling has to be facing the adoption of new soil, water, and space. So you should pick the vigorous, thickened basal stem, and fresh green leaves for up potting, and also the one which doesn’t have any injury on its stem.

Why Re-Pot Tomato Seedlings From Seed Tray?
Tomato Seedlings are generally grown in small pots or seed trays and need to be ‘potted on or transferred to a larger pot as they grow. This gives the roots more space to develop and encourages the plant to produce more foliage and eventually, fruit.
According to the research of the International Journal of Agricultural Science and Research, The researchers planted tomato seedlings in a seed tray with 4 different substrates and found that some produced better results than others.
Although the research suggests it, growing seedlings in direct soil may not be the best idea according to this data. In this study, seedlings grown in the shade were tested. It was determined that shoot height is an effective way to indicate seedling quality.
Table :The table below outlines which substrate is best for tomato plants in different-sized seedling trays-
| Tray Size and Capacity | Tray Size and Capacity | |
| Substrate | 72 Cell | 128 Cell |
| Soil | Medium | Medium |
| Coconut Fiber | Low | Low |
| Vermiculate | Highest Germination of Vigour Seedling | Highest Germination of Vigour Seedling |
Most tomato plants will need to be transplanted at least once, but some varieties (such as determinate varieties) may not need to be moved once they’ve been transplanted into the garden.
The seed tray is the best place for growing any vegetable seedling vigorously, diseased-free, and safely. You can grow multiple seedlings in it at a time and transplant them to the larger pots or garden beds later. This method is often used by commercial growers and is very effective.
How Many Days to Transplant Tomato Seedlings?
If you grow seedlings in a tray, pot, or soil under a playhouse, shade net house, or open field then the time and growth may be affected as per the geographical region.
The average time taken by a tomato seed to germinate is 5-7 days. The ideal temperature for the germination of tomato seeds is 25-30 degrees Celsius.
However, the seeds can also germinate at a temperature as low as 15 degrees Celsius but it will take more time, about 10 days.
In soil, you need to wait until the seedlings are big and strong enough. If you don’t allow enough time for the plant to adapt to its new environment, the roots will be destroyed when you transplant it.
Consequently, it will take longer for the plant to grow back. You can check the readiness of your seedlings by trying to lightly tug on them. If they come out of the soil easily, they are ready to be transplanted. If not, give them a few more days.
In the seed tray, when the first two leaves or cotyledons appear, it is time to transplant. Gently remove each seedling by its leaves, taking care not to damage the stem.
Transplant them into a prepared bed, placing them at the same depth they were in the tray.
How Much Time to Grow After Transplanting Tomato Seedlings?
As per the vast research, This table shows the average plant height (in cm) for tomatoes under different protected structures in a playhouse, shade-net house, or open field-
Table : You can get a rough idea of the plant height on different days after transplanting.
| Measures | 30 Day After Transplanting Height (Cm) | 60 Day After Transplanting Height (Cm) | 90 Day After Transplanting Height (Cm) | 120 Day After Transplanting Height (Cm) |
| Open Field/ General Garden | 27 Cm | 45 cm | 62 cm | 120 cm |
| Poly House | 43 cm | 75 cm | 90 cm | 150 cm |
| Shade Net House | 26 cm | 68 cm | 90 cm | 152 cm |
N.B: The data isn’t always accurate. If you grow your plant, the results may differ depending on the region, humidity, temperature, and rainfall.
How To Up Pot Tomato Seedling From Seed Tray?
As I continue my work on the seed tray, I notice that the roots of the tomato seedlings have begun to come through the drainage holes. I decided to up-pot the seedlings into individual pots to give them more room to grow. The process of transplanting seedlings from a seed tray is as follows-
#Step-1: Preparation of Materials
You will need the following materials:
- Tomato seedlings
- Individual pots
- Potting mix and
- Garden trowel.
After getting these materials, the next step is to fill the pots with potting mix. Use your garden trowel to fill the pots with potting mix, leaving about an inch of space at the top of the pot. Once you have filled all the pots, it is time to transplant the seedlings.
#Step-2: Seedling Separation
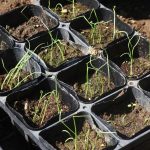
When too many seedlings occupy one space in the tray, they will need to be separated. Use your fingers to loosen the soil around the seedlings. Carefully lift the seedlings out of the tray, trying not to damage the roots.
If the roots are tangled, gently untangle them with your fingers. Although it’s not a major concern if some of the smaller roots are slightly affected, it’s still best practice to have only one seedling per compartment of the seed tray.
#Step-3: Transplanting the Seedlings
To transplant the seedlings, gently remove them from the seed tray, being careful not to damage the roots. Place each seedling in a pot, and then backfill the pot with potting mix. Gently press down on the potting mix around the base of the seedling to secure it in place.
Different size pots can be used for transplanting seedlings, but it is important to choose a pot that is not too large. If the pot is too big, the roots will have difficulty taking up water and nutrients and the plant will be more susceptible to disease. In general, 5-10 gallon pot can be used for transplanting seedlings.
#Step-4: Observe the Plants
Once the seedlings have been transplanted, water them lightly. Be sure to keep an eye on the seedlings and watch for signs of distress such as wilting or yellowing leaves.
If you see any problems, address them immediately. If it bothers you more than it should, then change the seedling.

How to fix tomato transplant shock?
Tomato Transplant Shock can be described as the sudden wilting and drooping of a tomato plant that has been recently transplanted. This is caused by the loss of water through the leaves due to the stress of transplanting.
I have been facing the problem a couple of times that my plant gets wilt and looks like it’s dying. I was wondering if there is any solution to this or any way to prevent it.
There are a few things you can do to help reduce the chances of tomato transplant shock in your seedlings.
- Water the plant thoroughly before transplanting, and again immediately after transplanting.
- Shading the tomato for 2 weeks after transplanting,
- Avoiding damage to the roots when transplanting.
- Keep the soil moist at 1-2 inches deep
- Planting the seedlings in well-draining soil.
If your plant does experience transplant shock, there are a few things you can do to try and save it.
- Apply a light organic mulch around the base of the plant ( 1-1.5 inches thick ) to help retain moisture.
- Make sure the plant is getting enough sunlight, but avoid excessive heat.
- Give the plant time to adjust to its new location. With proper care, it should recover within a few weeks.
Conclusion:
As an agriculturist, I can say, the timing of planting is crucial to success. If you are considering transplanting your tomato seedlings, be sure to do so when the weather and conditions are favorable. By following the tips above, you can help reduce the chances of your plant experiencing transplant shock.
So I hope you will find this information helpful. Take care of your plants and they will take care of you.

I am a graduate of Bangladesh Agricultural University, where I delved into various agricultural disciplines, equipping me with a profound understanding of agriculture. Beyond academics, I have hands-on experience in gardening and crop cultivation. My passion is to embrace sustainable farming and horticulture. With a BSc in Agriculture, I am dedicated to promoting environmentally conscious and efficient agrarian practices.
Bachelor of Science (BSc) in Agriculture (Hons.)
Master of Science. (Sustainable Agriculture & Food Security ) (MS)
Bangladesh Agricultural University
![How To Separate Tomato Seedlings? [Interesting Facts Revealed] 1-36](https://broadpick.com/wp-content/uploads/2023/11/1-36-150x150.jpg)


